In honor of Raspberry Pi recently announcing the new Raspberry Pi 5, I thought I would post a project that I built a couple years ago with a Raspberry Pi Pico. This project is a macro keypad built with a Raspberry Pi Pico running CircuitPython and a 3D printed enclosure and keycaps intended to act as a homemade Stream Deck.
Parts Required
- Raspberry Pi Pico
- Cherry MX mechanical key switches
- Adafruit LED Sequins
- 3D printed enclosure
I ordered the majority of the parts, including the Pico, the LED Sequins, and the key switches, from https://www.adafruit.com. I also 3D printed both the enclosure and the keycaps using slightly modified versions of the following designs from Thingiverse:
- https://www.thingiverse.com/thing:4186055
- I had to modify this enclosure design slightly because it was originally meant for a smaller Arduino, so it didn’t fit the Raspberry Pi Pico
- https://www.thingiverse.com/thing:4126150
- I slightly modified these keycaps to add a small gap at the bottom to allow the LED to shine through
Starting to Put It Together
The first step was to print the enclosure and insert the key switches into the faceplate.

The next step was to add the LED Sequins to the back of the key switches. These LEDs were actually originally intended by Adafruit to be used in wearable projects, such as cosplay, and can be sewn into fabric using conductive thread. However, I discovered that these small and easy to use LEDs fit perfectly into the little gap at the bottom of the key switches. I just had to fit them into the gap at the bottom of the switch, add one drop of super glue to hold them in place, and the light would shine through the key.

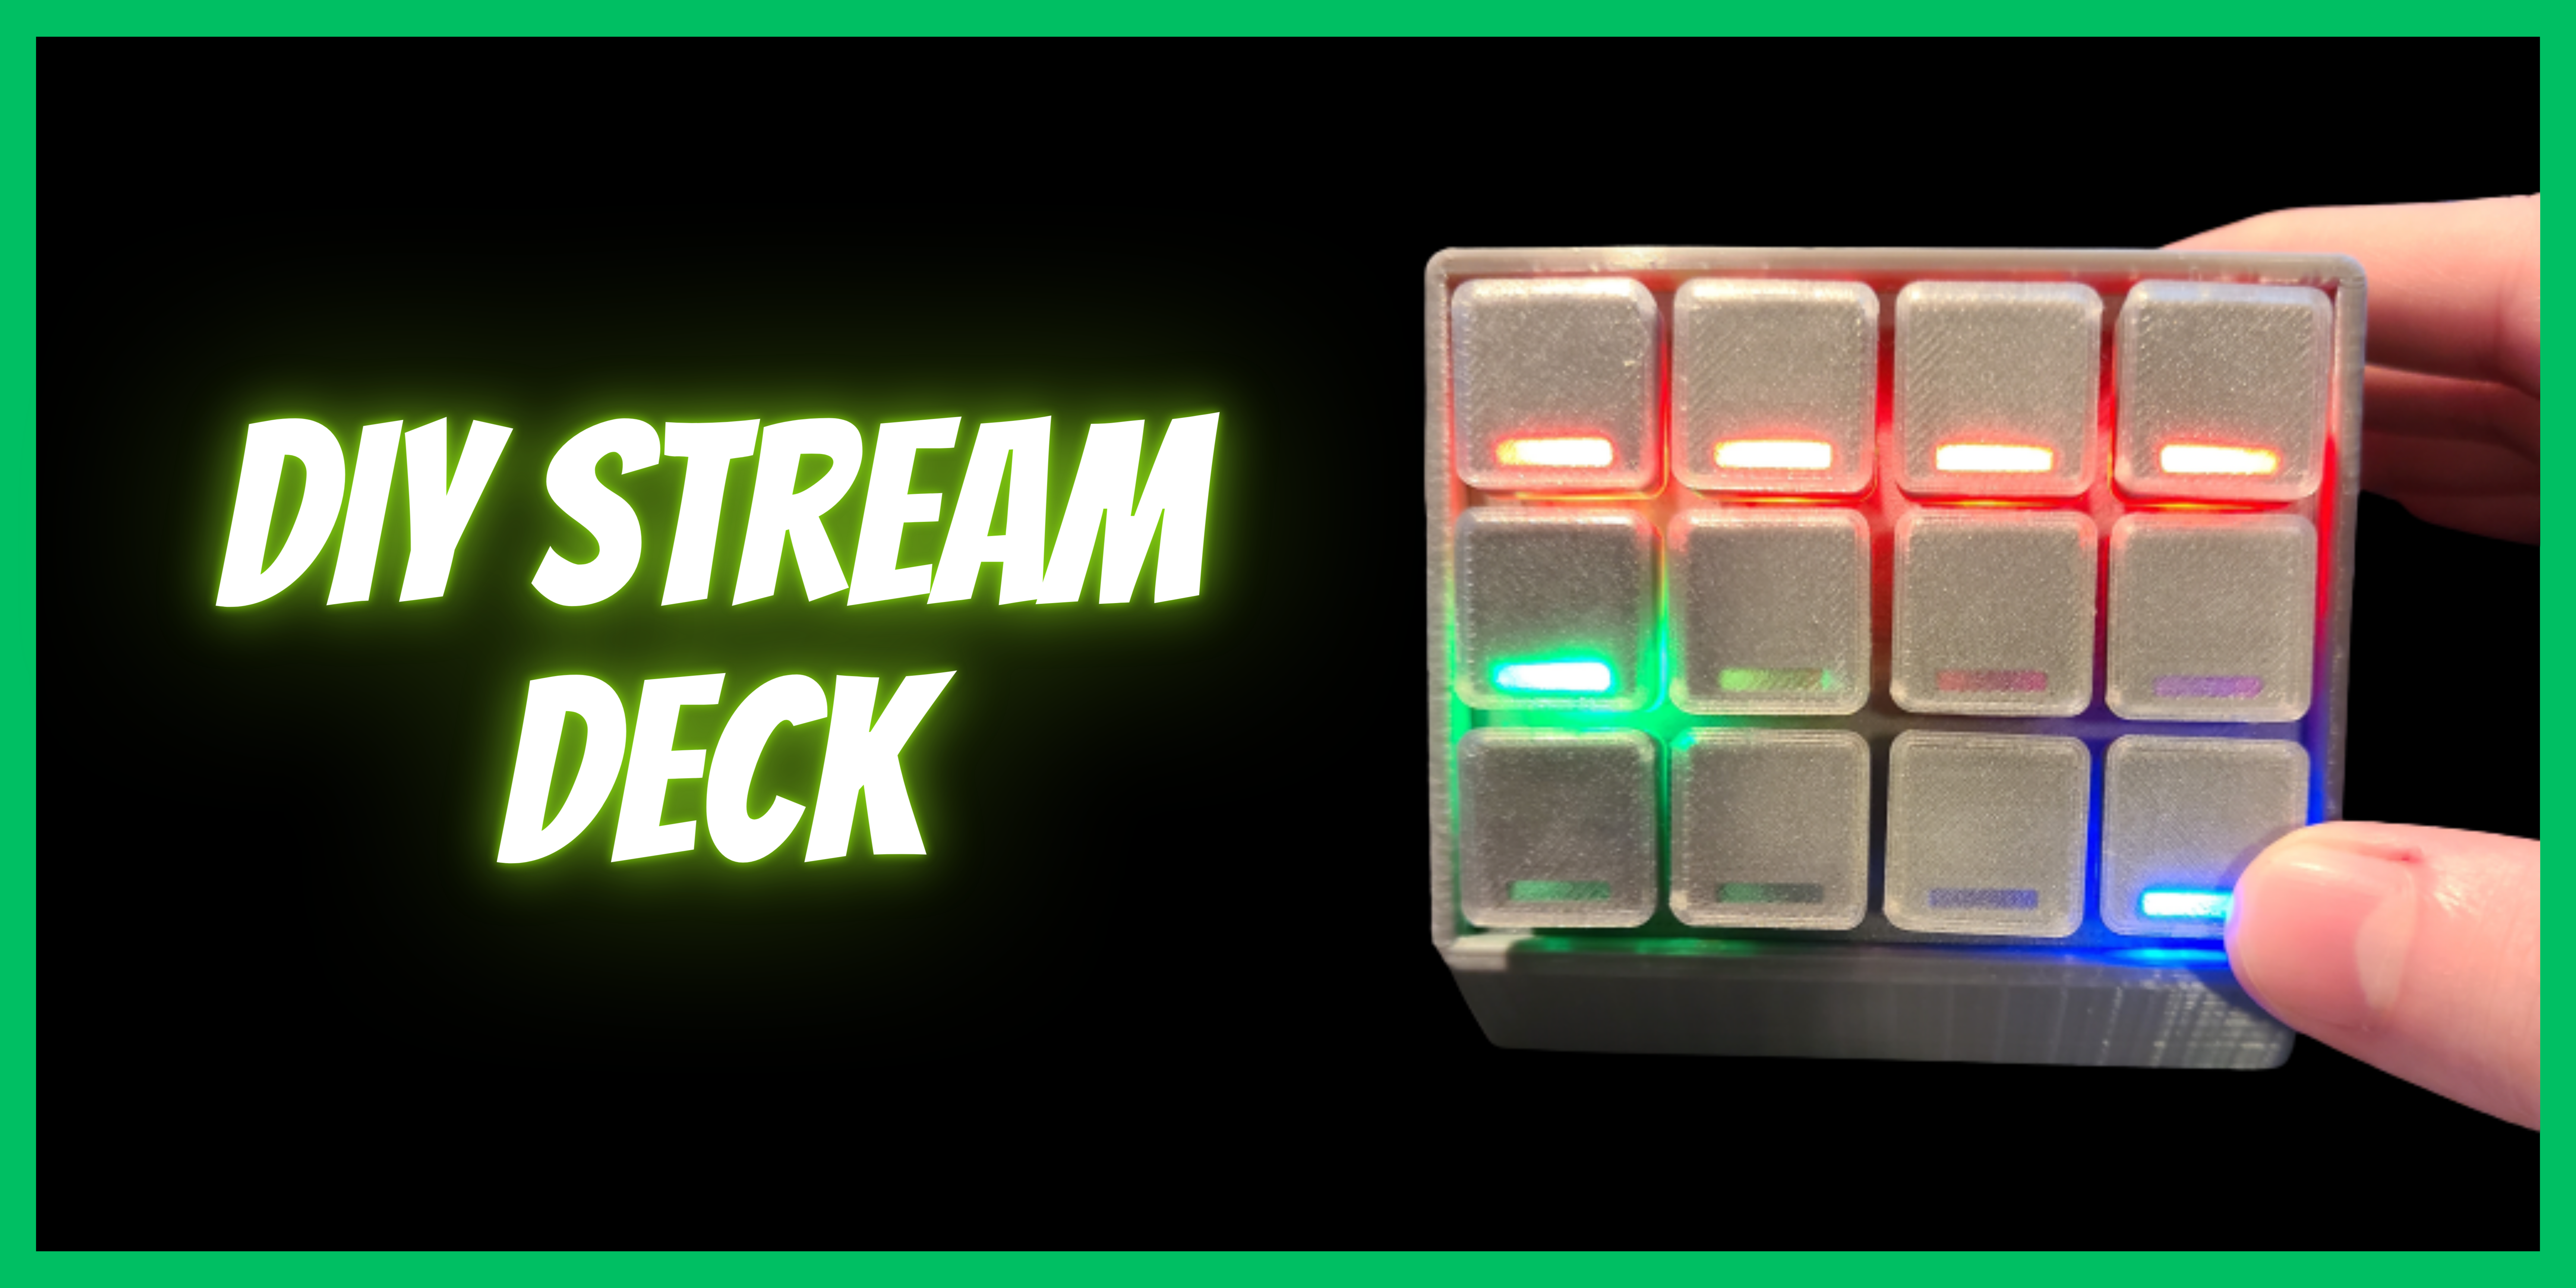
I chose to give each row of buttons slightly different behavior and different colored LEDs.
- The top row has red LEDs and they work like a toggle (pressing once turns on the LED, pressing a second time turns it off). This was meant to be assigned to mute or deafen functions, such as muting Discord
- The middle row has green LEDs and works like a switcher (pressing one of them turns on the LED, pressing a second button turns off the first one and turns on the new one). This was meant to work as a scene switcher
- The bottom row has blue LEDs and only activates while pressed. This was meant to be assigned to functions like sound alerts that only activate when the button is pressed
Wiring
The Raspberry Pi Pico has 26 GPIO pins, and I used 24 of them (12 for the key switches, 12 for the LEDs). I also used the 3v3 pin (pin 36) and a ground pin (pin 38).

The first wiring I did was to connect all of the top left pins of the switches to one another. This wire will be connected to the 3v3 pin on the Pico to power the switches. The second step in the wiring was to connect the left (-) side of all of the LEDs to one another. This wire will be connected to pin 38 on the Pico to ground the LEDs.

Next, I soldered a wire to the right pins of each of the switches. These wires will be connected to GPIO pins on the Pico (pins 4-7, 9-12, and 14-17). Then, I soldered a wire to the right (+) side of each of the LEDs. These will also be connected to GPIO pins on the Pico (pins 19-22, 24-27, 29, 31, 32, and 34).


Finishing Putting It Together
After soldering all of the wires to the pins on the Pico, the only thing left (other than the code) was to put together the enclosure and add the keycaps to the switches. I used super glue to attach the Pico to the bottom of the enclosure making sure that it was pushed all the way to the rear so that the micro USB port was accessible through the opening in the back of the enclosure. Once the glue dried, I tucked all of the wiring into the enclosure and pushed the face plate into the front of the enclosure.
The last step was to add the 3D printed keycaps. The keycap design that I chose is relegendable, meaning that they have a removable top that allows you to add a custom label. I printed the bottom of the keycap with gray filament and the top with transparent filament so a label would show through.

The Code
For this project, I installed CircuitPython on the Raspberry Pi Pico. Adafruit already has a guide for installing CircuitPython at https://learn.adafruit.com/getting-started-with-raspberry-pi-pico-circuitpython/circuitpython. At the time when I was originally working on this project, the most current stable release was version 6.3.0. However, I chose to use the alpha build of 7.0.0 because this version introduced a few new features, including the ability to turn off some of the USB devices that are enabled by default. I wanted this device to be as minimally intrusive as possible, so I didn’t want anything like a USB mass storage device mounted when it was plugged in. After installing CircuitPython, I had to install the Adafruit HID library to allow the Pico to interact as a keyboard. Documentation on installing libraries can be found at https://circuitpython.org/libraries.
The code that I wrote for this project can be found on my GitHub at https://github.com/btcor/pico-streamdeck. The code that actually makes the Stream Deck work is in the code.py file. In order to take advantage of the feature mentioned above allowing me to disable USB devices, I had to add the boot.py file, which runs immediately when the Stream Deck is plugged in. Since the code in that boot.py file prevents the USB mass storage device from mounting, that means that it isn’t possible to access the files on the device if there is any reason to edit the code or make any changes in the future. As a safeguard for this possibility, I added the function to mount those USB devices if the bottom right button is held down when the Stream Deck is plugged in.
Assigning Functions to Buttons
The code in code.py assigns the buttons to key combos using the hidden F13, F14, F15, and F16 keys. Most applications (including Discord and OBS) will recognize these keys, and they will allow you to use these key combos as hotkeys.
Below are screenshots showing the Stream Deck buttons being assigned as hotkeys in Discord and Streamlabs.


If you’re interested in more content about security, hacking, making, and tech, check out my YouTube channel at https://youtube.com/@CorSecure.